

Overview
The Autonomous HVAC CFD Connector brings your Autodesk Revit building designs into Autonomous HVAC CFD (AHC), where you design HVAC systems and assess them with cloud simulation. The workflow has three stages:
Prepare and check the model in Revit with the Autonomous HVAC CFD Connector.
Share it: create a data exchange of the checked design and push it to Autodesk Forma (formerly Autodesk Construction Cloud).
Simulate: pull the data exchange into Autonomous HVAC CFD.
The connector comes as two free apps from CCTech on the Autodesk App Store:
Autonomous HVAC CFD Connector: the Revit add-in that validates
the design and makes it ready for AHC.
Autodesk App Store
AHC Connect: the Autodesk Forma app that gives Autonomous HVAC CFD
read access to project information such as geometry, materials and
metadata.
Autodesk App Store
System Requirements
Software
| Operating System | Windows (for the Revit add-in) |
| Autodesk Revit | Revit 2023 or 2024 |
| Data exchange | Autodesk Data Exchange Connector for Revit |
| Autodesk account | Autodesk Forma (formerly Autodesk Construction Cloud) |
Prerequisites
An Autonomous HVAC CFD account:
log in or start a free trial.
The Autodesk Data Exchange Connector for Revit is installed,
to create data exchanges.
The AHC Connect app is added to your Autodesk Forma account
(see Set up your account below).
Install the Revit add-in
Download the Autonomous HVAC CFD Connector from the Autodesk App Store.
Run the installer (it may start on its own after the download), or double-click the downloaded installer.
Restart Revit if needed to activate the add-in.
Set up your account
An Autodesk Forma account administrator does this once for the whole account.
In Autodesk Forma, open Account Administration and go to the Apps tab.
Find the AHC Connect app and add it to your account.
The AHC Connect integration is now active in your account.
1. Prepare and check the design in Revit
Create your design in Revit with the Autonomous HVAC CFD Revit template.
When the design is ready, go to the Add-Ins tab and click AHC Connector.
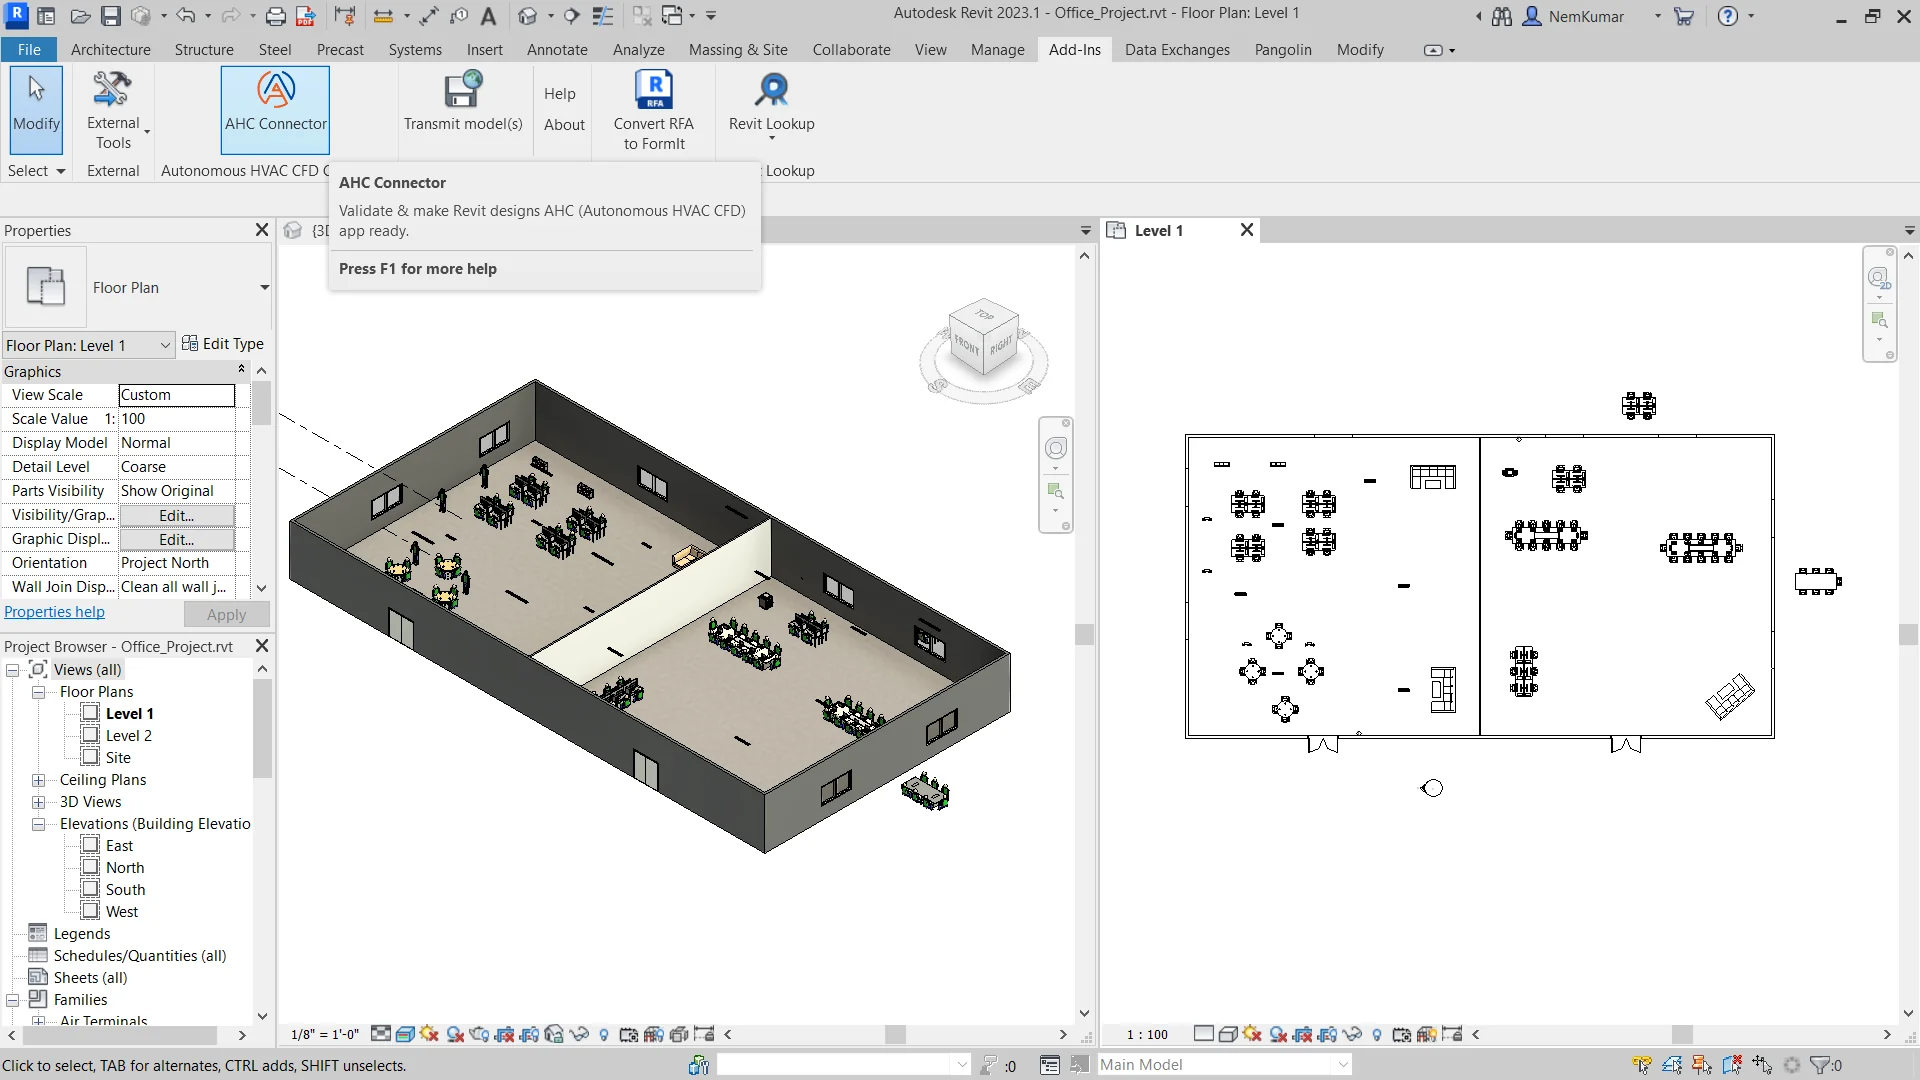
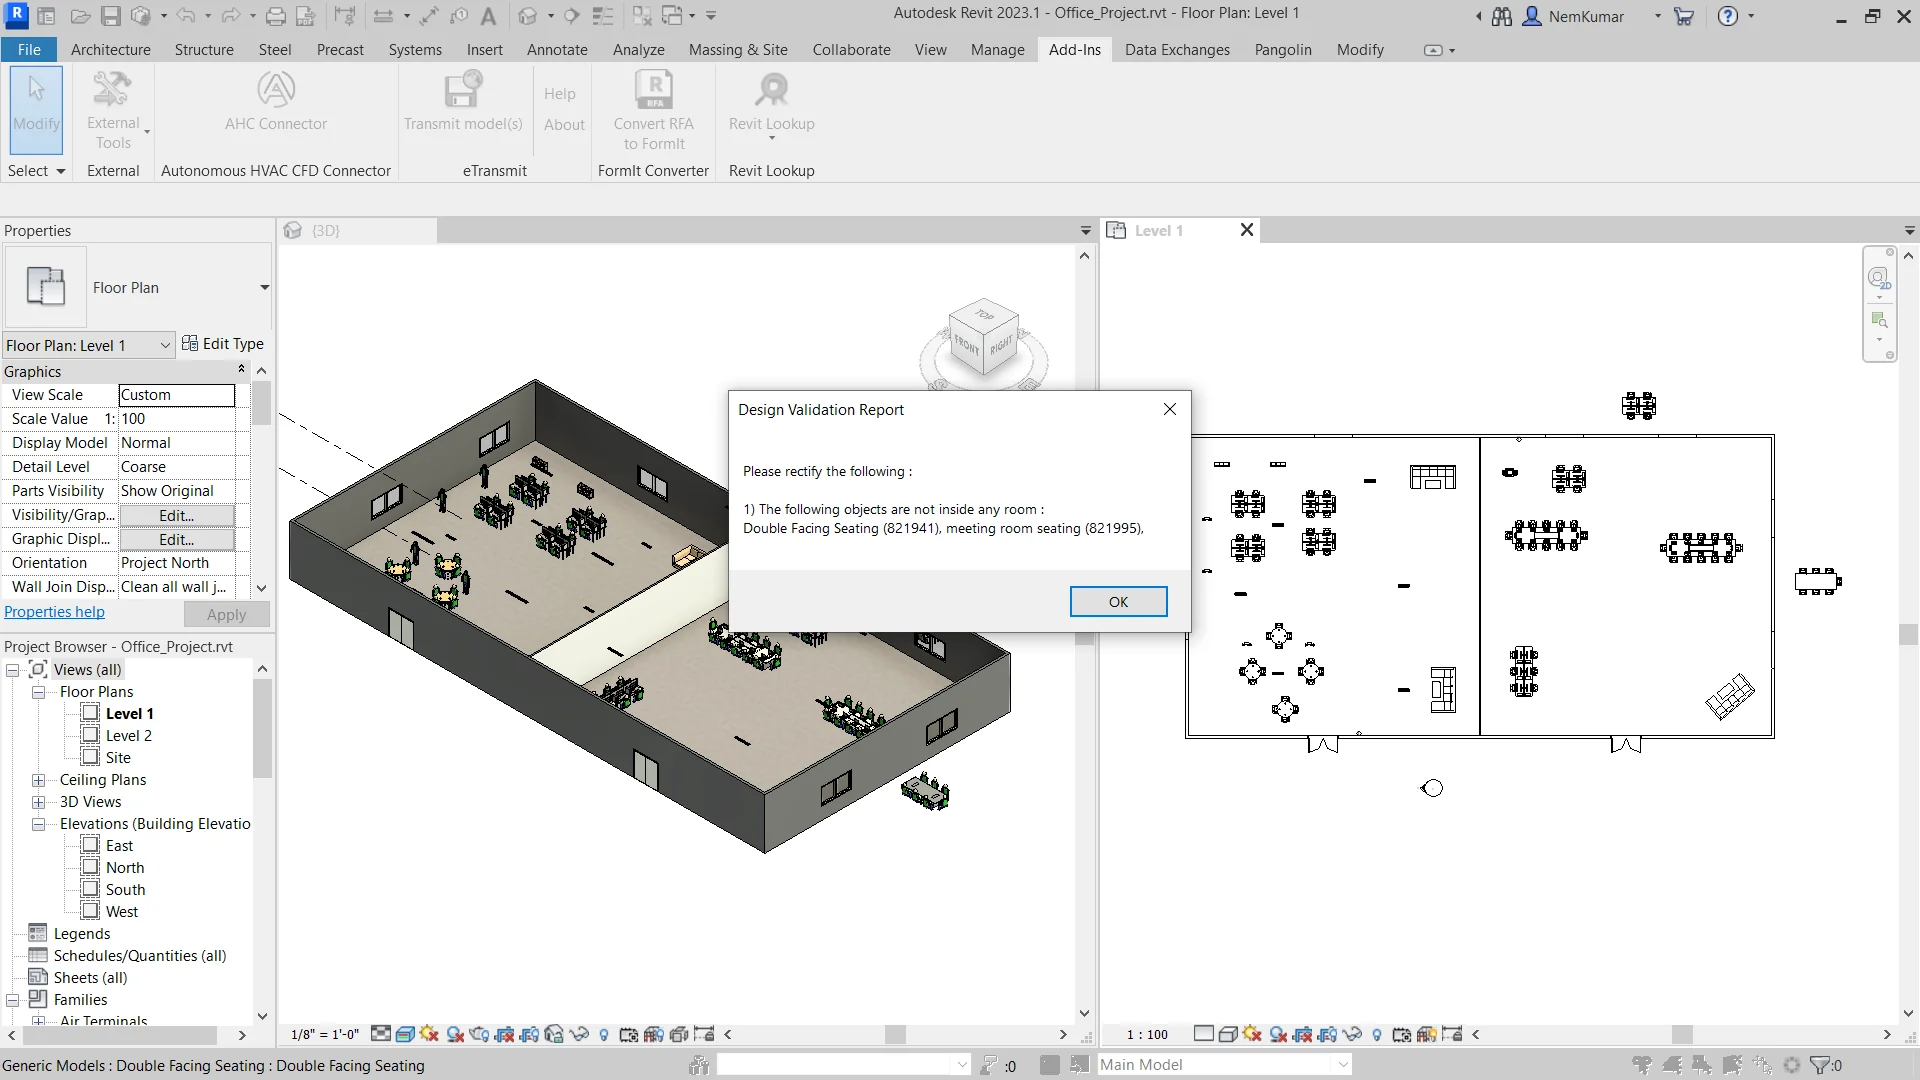
If the design needs changes, the Design Validation Report lists them. Make the changes and click AHC Connector again.
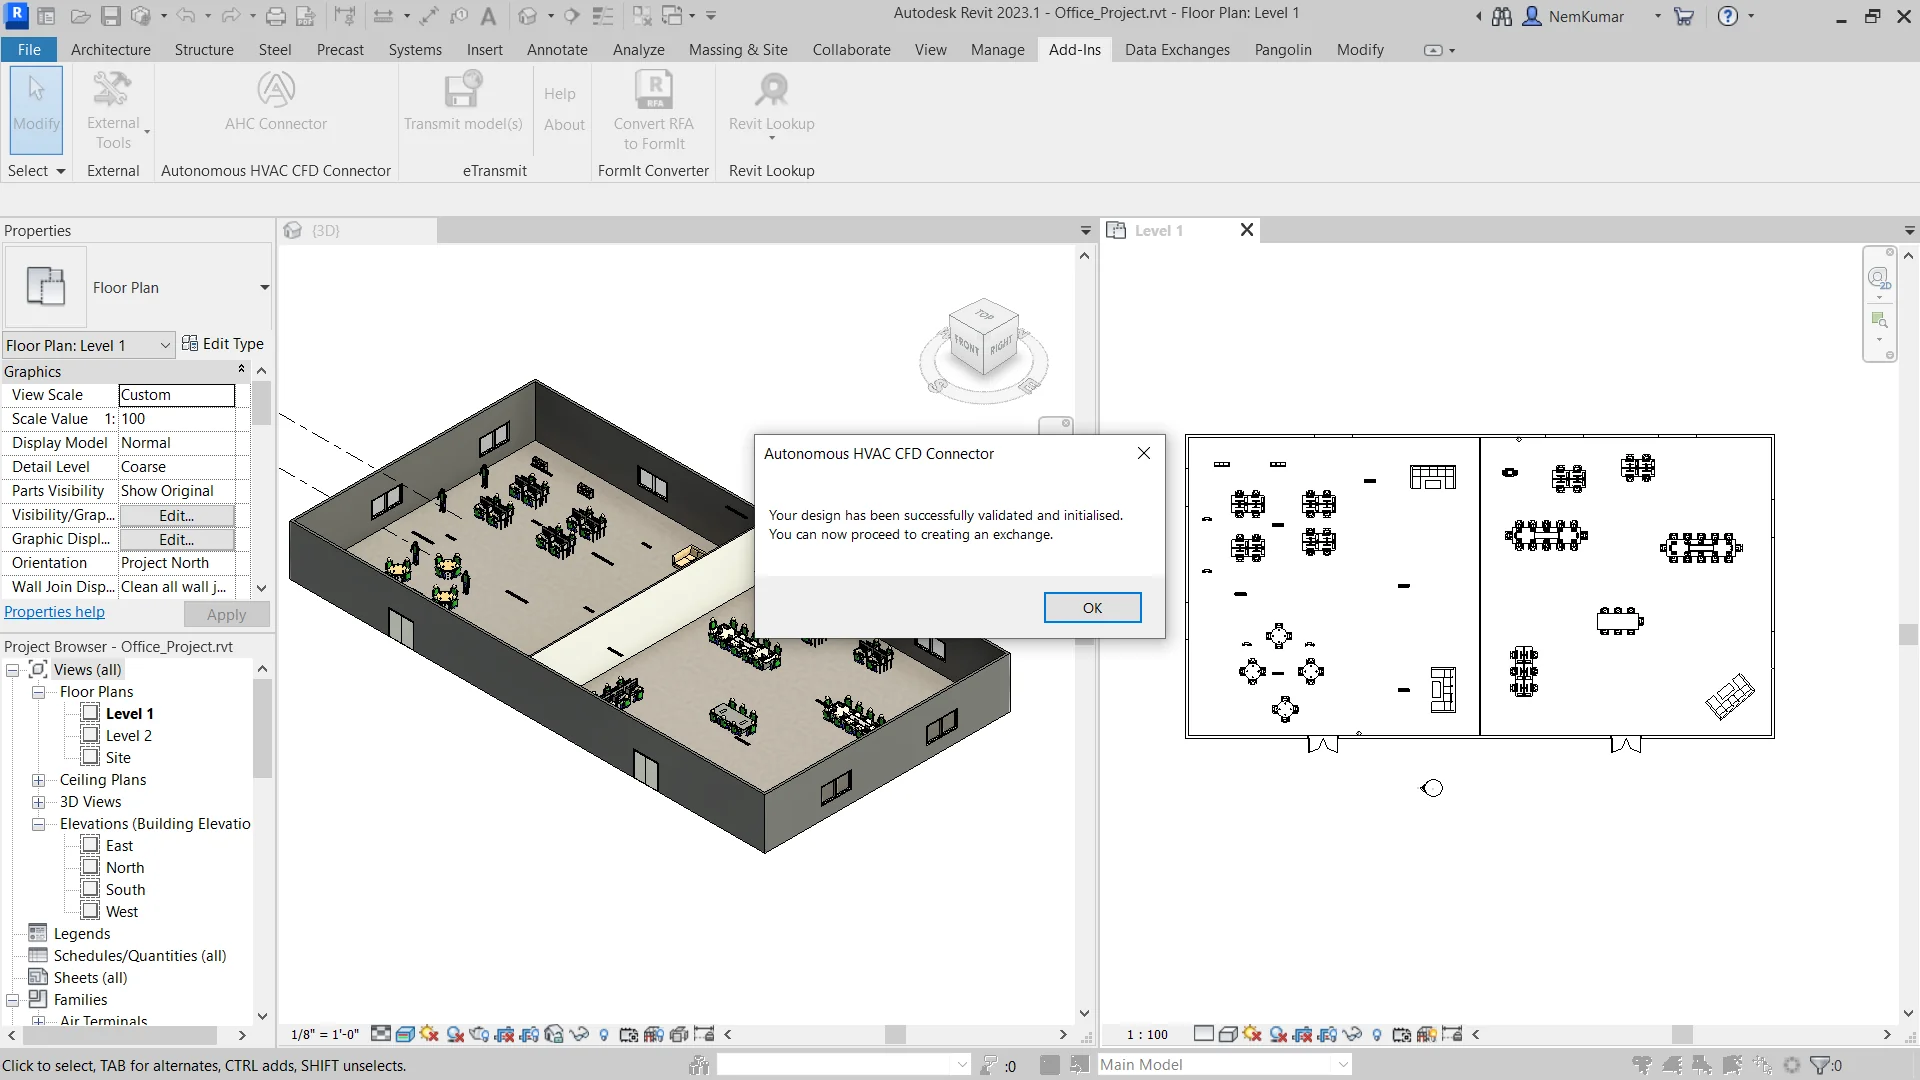
Repeat until the validation succeeds.
When the design has been validated and initialised, a message confirms that you can go on to create a data exchange.
2. Create the data exchange and push it to Forma
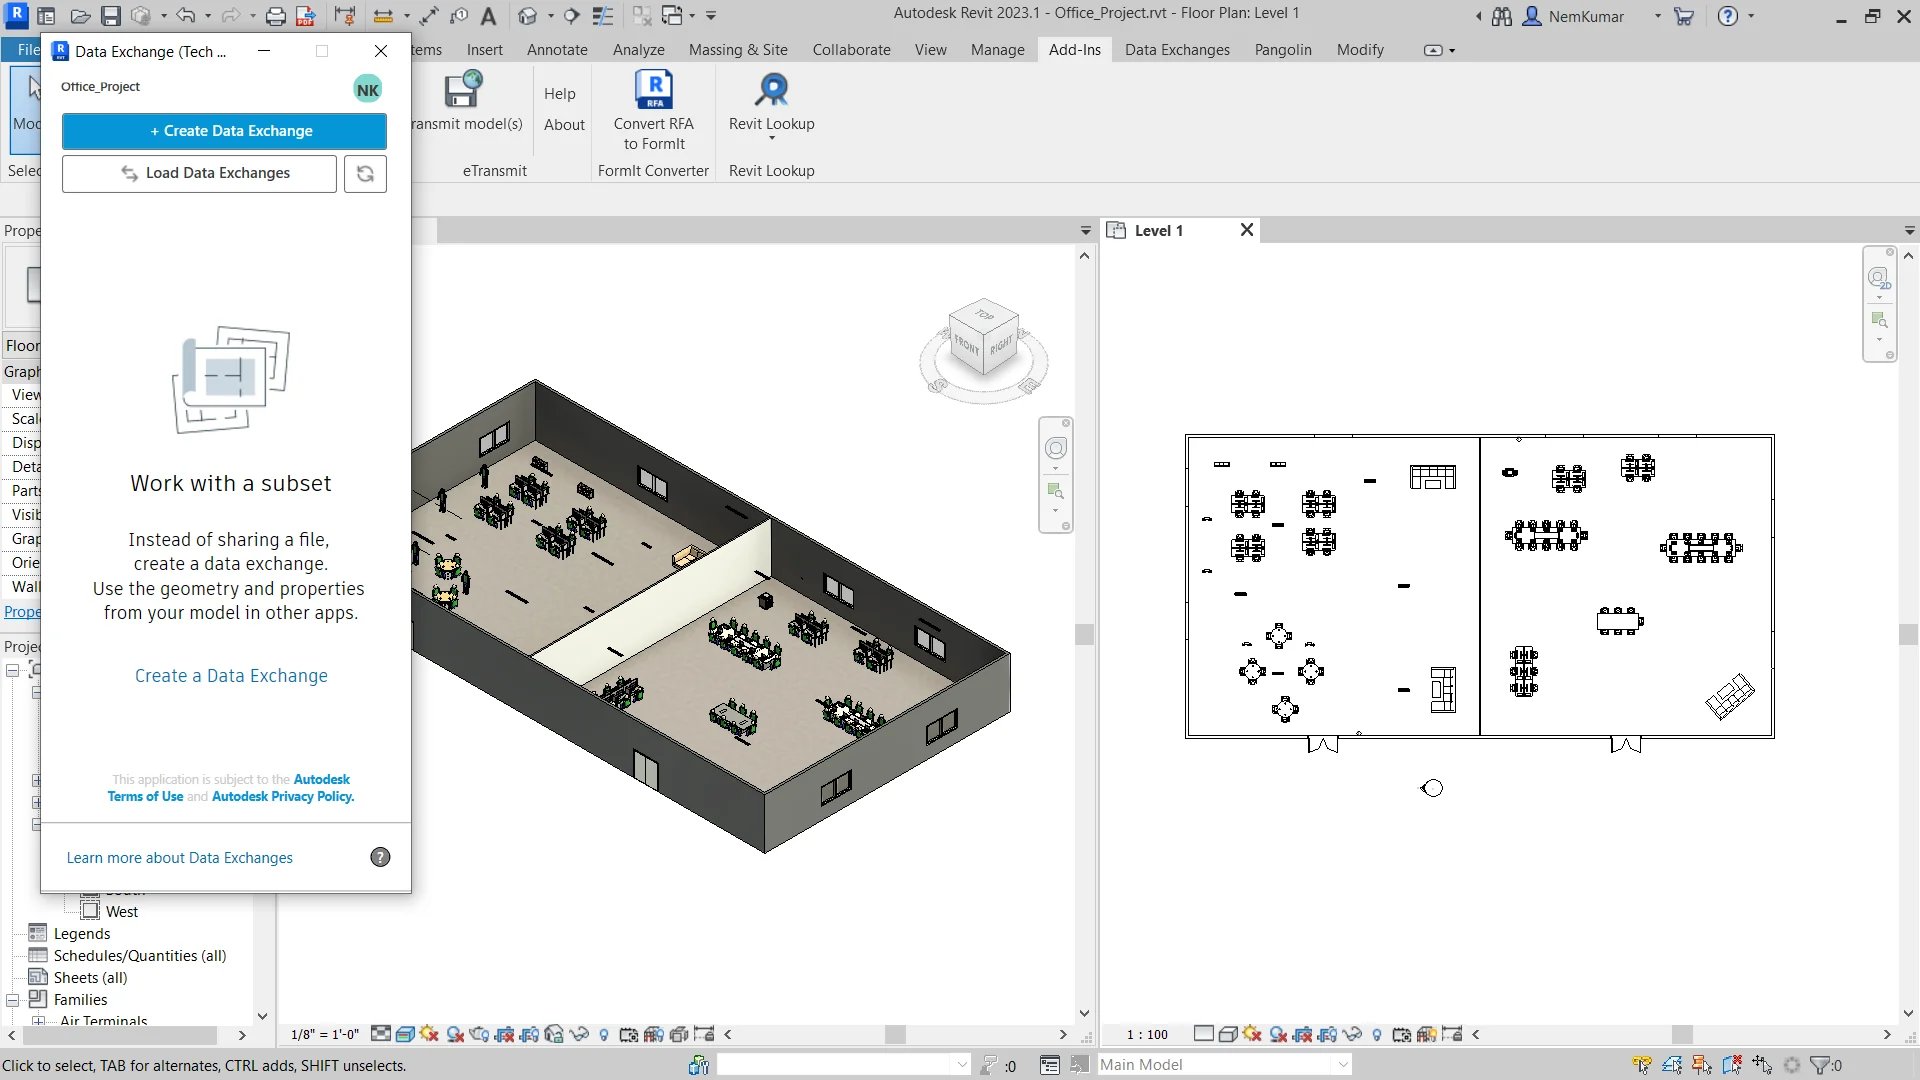
Revit 2023: after a successful validation, the Autodesk Data Exchange Connector for Revit opens.
Revit 2024: go to the Collaborate tab and click the Data Exchange Connector.
Click Create a Data Exchange and save the data exchange of the design to your Autodesk Forma project.
3. Import the design into Autonomous HVAC CFD
Go to Autonomous HVAC CFD and log in, or start a free trial.
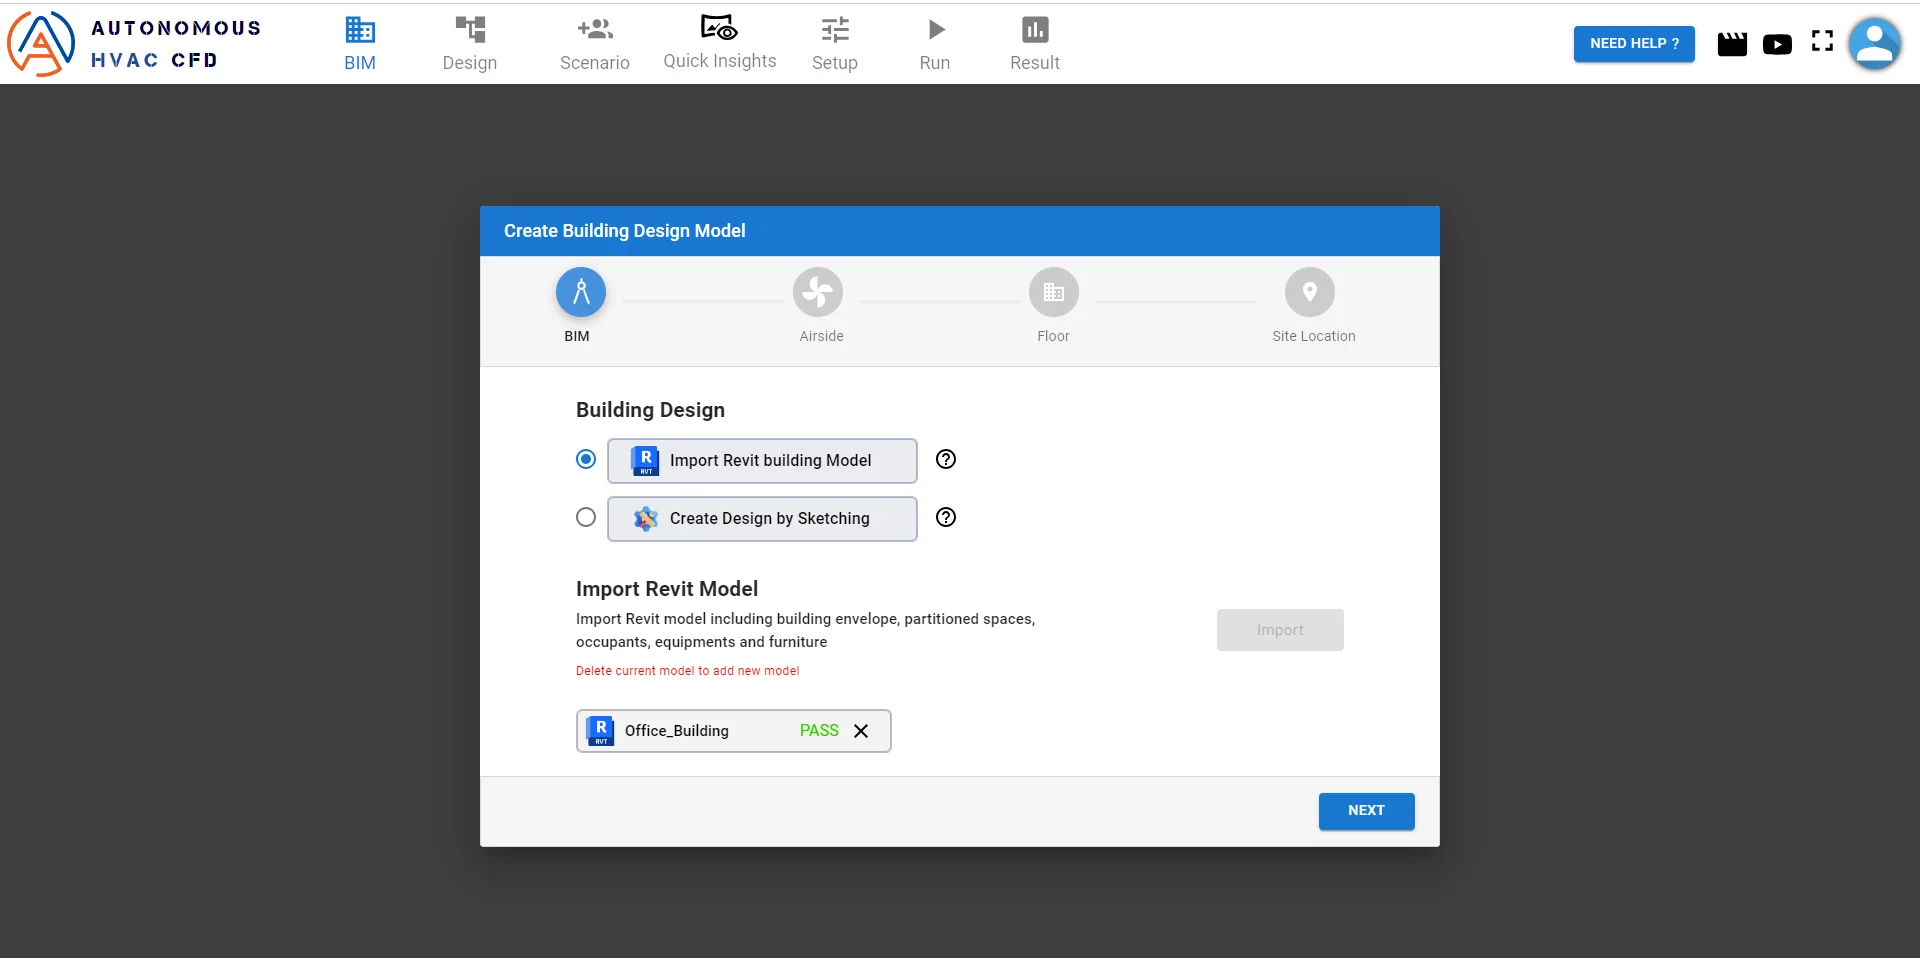
Create a project and choose Import Revit building model.
Sign in with your Autodesk account. Your Autodesk Forma hubs, projects and folders appear.
Choose the data exchange you want to load.
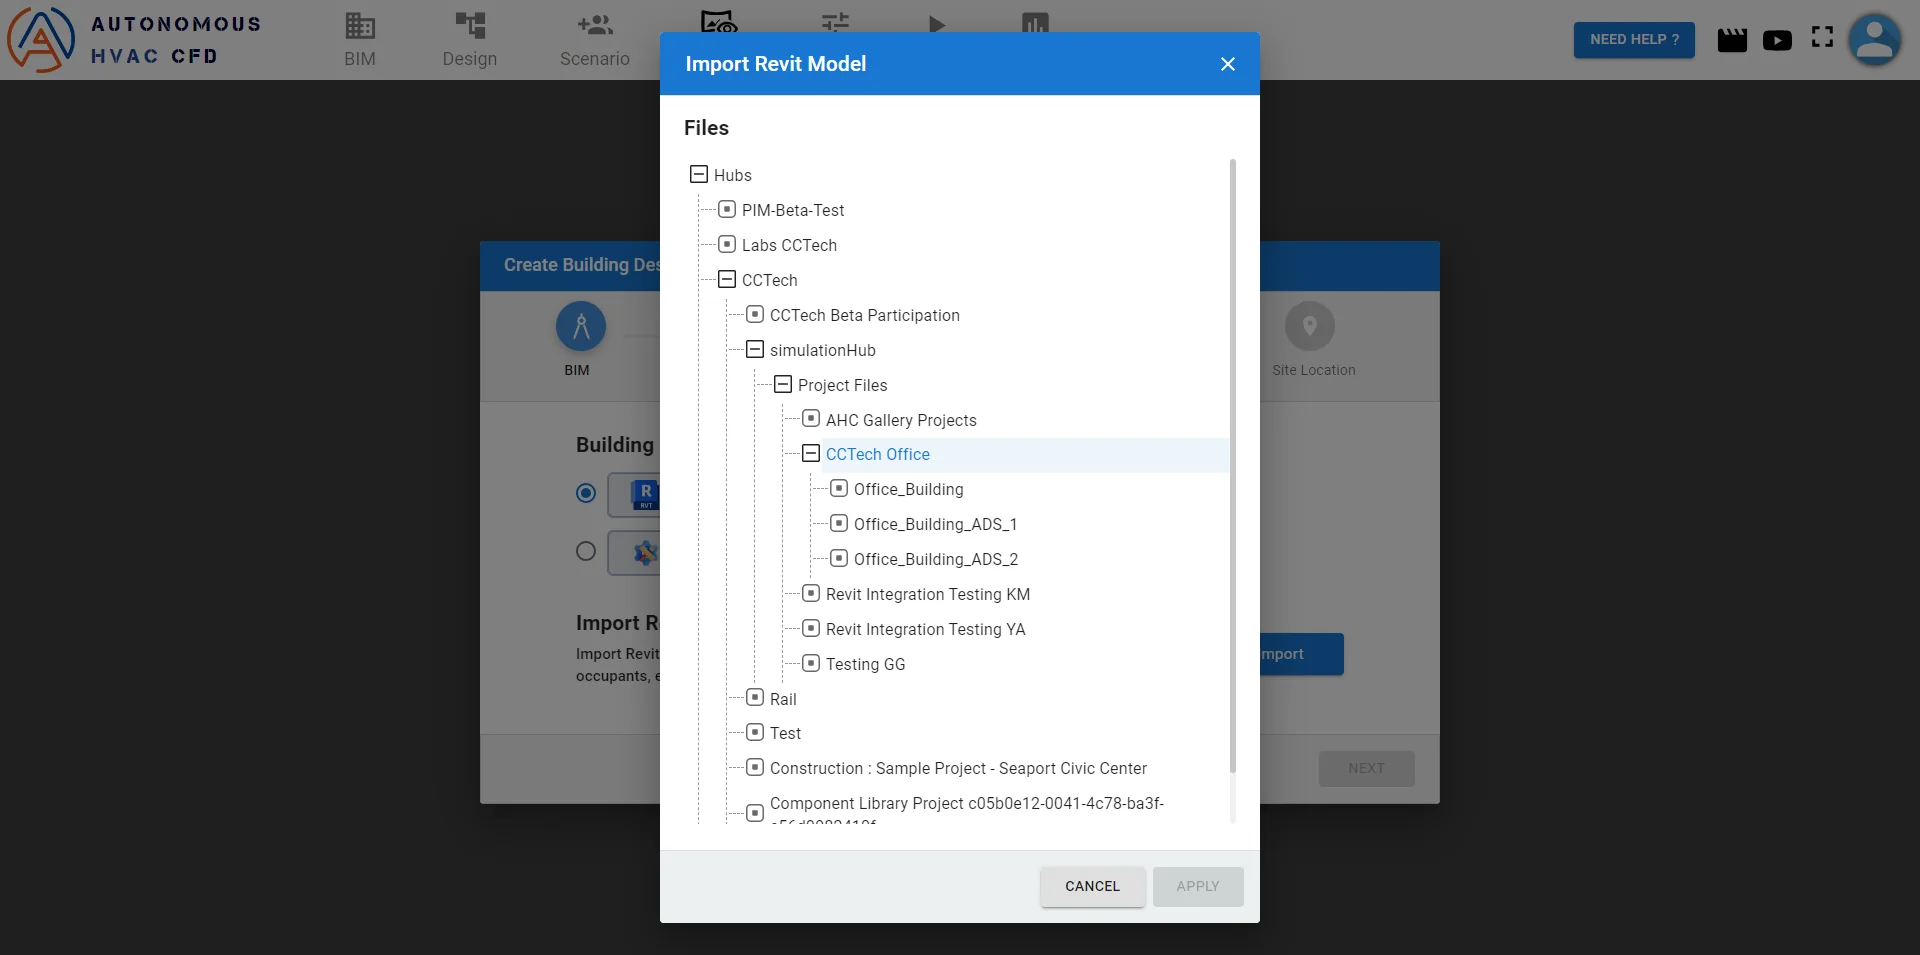
The data exchange is processed and its status shows Pass or Fail.
Once the design has passed, import the air distribution systems for the same design.
Then move on to the simulation.
Uninstall the Revit add-in
Close Revit.
Run the installer again and choose Uninstall, or open Control Panel > Programs > Programs and Features and uninstall it like any other application.